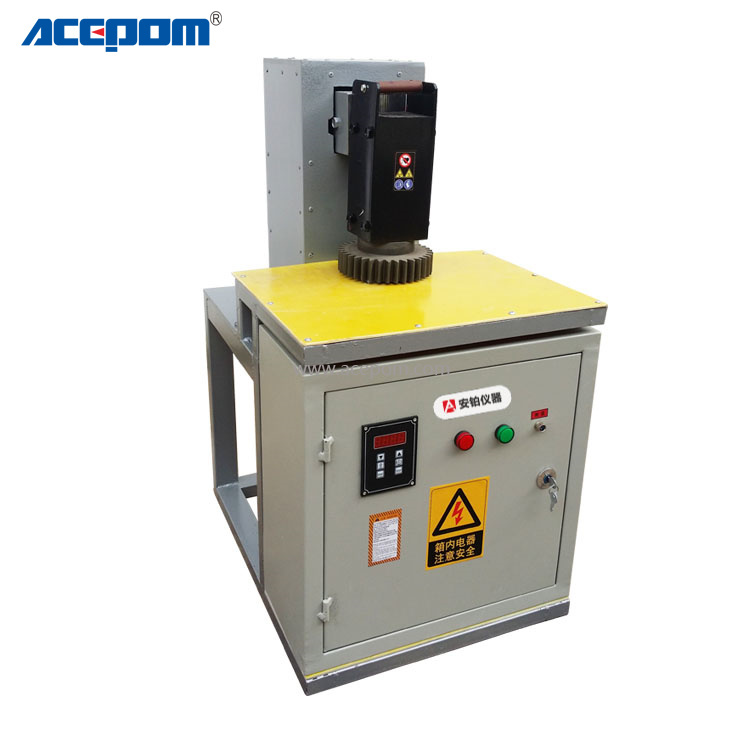
Induction gear heater SL30K-1/2/3 Installation and disassembly of electromagnetic induction
Induction gear heater SL30K-1/2/3 Installation and disassembly of electromagnetic induction
- Detail
- Parameters
Catalogs of SL30K series:
Note: Inner diameter , max external diameter and max width are for gears to be heated.
model | Power(KVA) | Inner diameter(mm) | Max external diameter(mm) | Max Width |
SL30K-1 | 12 | 10-25 | 70 | 30 |
SL30K-2 | 14 | 10-40 | 80 | 35 |
SL30K-3 | 18 | 10-70 | 100 | 35 |
SL30K-4 | 20 | 10-90 | 120 | 40 |
SL30K-5 | 35 | 30-110 | 300 | 150 |
gear heater operation guide:
1.Control box and main machine should be installed in proper place.The left and right directions of the main engine should be horizontal, and the front and rear vertical directions are allowed to tilt backward no more than 3 degrees.
2. After the installation is completed, the electrical schematic diagram must be checked before use to see if the wiring is wrong.
3. After correct, close switch, turn on the power supply, at this time the voltmeter should indicate.
4. The heated workpiece is placed under the movable yoke iron in the middle of the iron core of the main machine and gently moved downward to make it consistent with the workpiece (if the thickness and size of the workpiece remain unchanged, the positioning screw under the rear lever bridge of the main machine can be adjusted to keep the distance between the yoke iron and the workpiece 2mm to facilitate continuous operation).At this point, the end of debugging, can be put into use.
Opearion sequence:
1. Press the start button, the main machine is powered on, the time relay starts counting, the unit is seconds, and the workpiece is heated.
2. Before pressing the stop button, count the time, then take out the workpiece and measure whether the temperature rise at the plane of its inner diameter end meets the requirements, so as to make the suit.
3, continue to heat the workpiece of the same specification, the function selection switch will be moved to the control position, set the heating time, when the workpiece is heated to the set time that automatically shut off the power supply.
4. After the work is completed, turn the power switch to the stop position and cut off the power.At this point, the end of debugging, can be put into use.